

Create Menus - Editor, API Reference and Links
Enhance flexibility by generating unlimited menus, allowing you to customize your documentation, you can create changelogs, blogs, and more using the editor guide. Generate multiple API reference menus and organize API references according to your preferences. Link menus enable effortless linking to external pages.


Editor Menus
The Editor menu is the heart of Doxify, offering a versatile block editor that simplifies the creation of guides, knowledge bases, changelogs, and blogs. Each menu added in the dashboard translates into a corresponding section in your documentation, ensuring a cohesive user experience.
To create an Editor menu, simply click on the "+" sign located on the menu bar. In the pop-up wizard, input the desired name for the menu - this name will appear on the button in the documentation header. Proceed by adding a slug, then select "Editor" from the dropdown menu under "select menu type."
API Reference Menus
If the Editor menu represents the heart, then the API Reference menu undoubtedly serves as the brain. This indispensable feature enables users to craft meticulously designed API documentation within seconds. With the ability to create multiple API Reference menus and sub-menus, users can effortlessly organize their documentation according to their specific needs.
For instance, users can categorize different types of APIs - such as REST APIs and JSON RPC - within a single API Reference menu or distribute them across multiple menus. In the first scenario, users can toggle between the two API references and their minor versions using the Version dropdown menu, ensuring flexibility and clarity in navigating through the documentation.
To create an Editor menu, simply click on the "+" sign located on the menu bar. In the ensuing pop-up wizard, input the desired name for the menu. This name will appear on the button in the documentation header. Proceed by adding a slug, then select "Editor" from the dropdown menu under "select menu type." For additional settings, such as adding icons, switching to grid view, or managing categories, table of contents, and page quality, navigate to the menu bar after creating the menu. Click on the downward pointing arrow next to the menu button to access these settings. You can also modify the name or slug of the menu as needed.
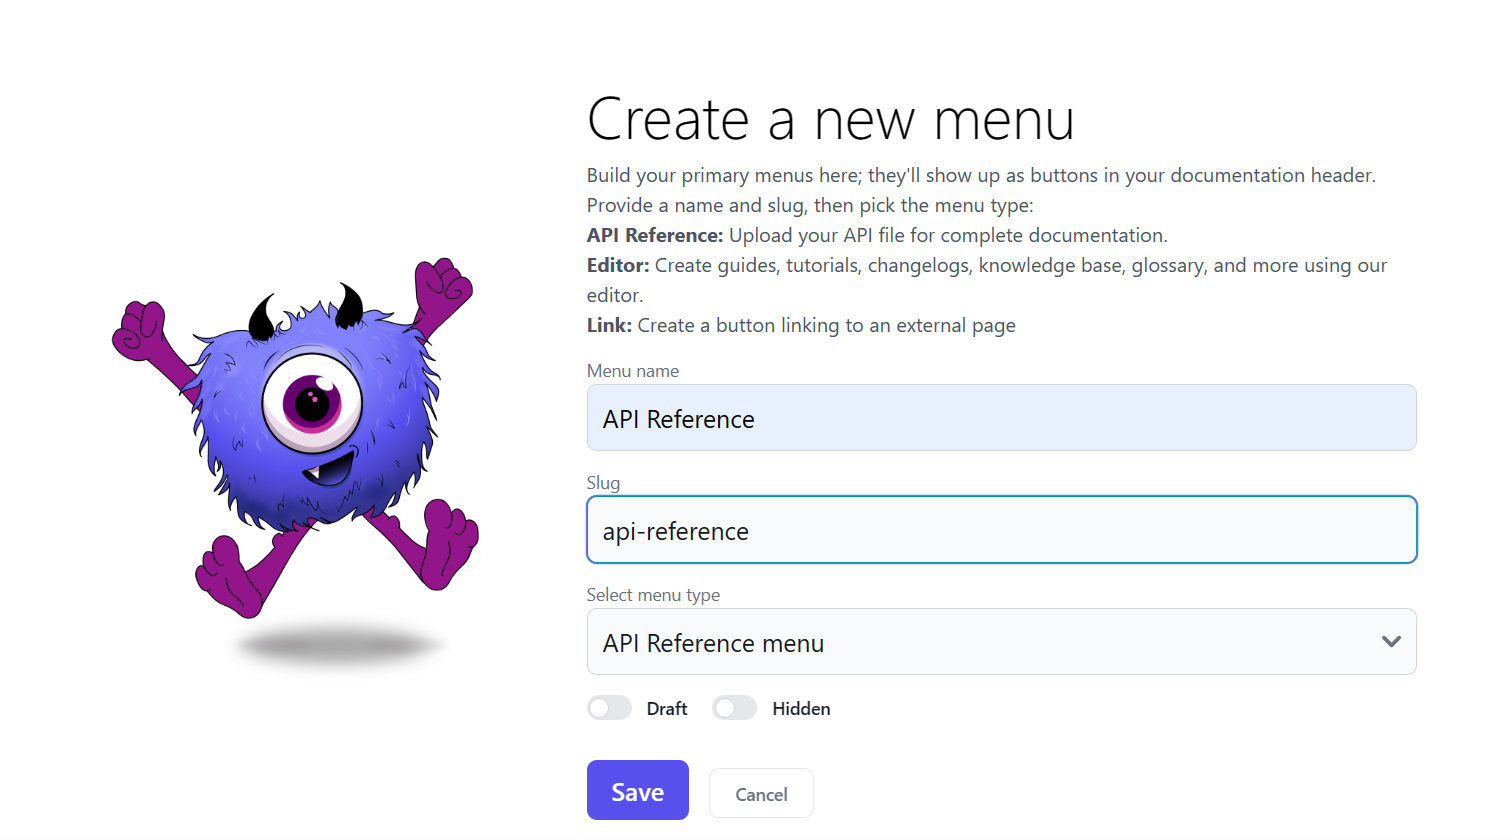
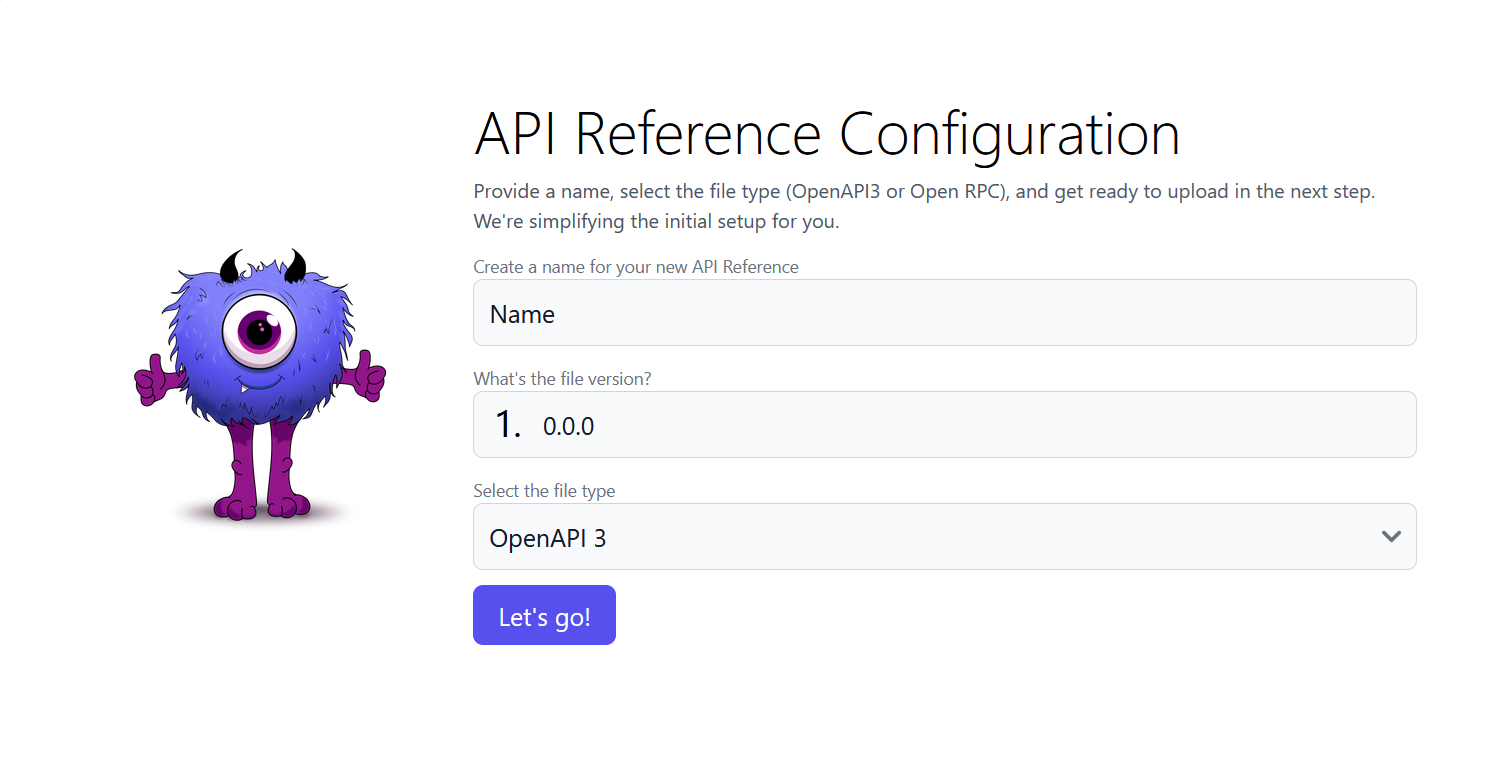
To create an API Reference menu, click on the "+" sign in the menu bar. In the pop-up wizard, enter the desired menu name. This will display on the button in the documentation header. Add a slug, then choose "API Reference" from the dropdown menu under "select menu type." Next, specify the API Reference name, version, and file type (OpenAPI or OpenRPC). Finally, upload the file. For additional settings like adding icons, enabling "Try It," showing code examples, and selecting languages, go to the menu bar after creating the menu. Click the downward arrow next to the menu button to access these settings. Modify the menu name or slug as needed.
Link menus
Link menus offer the flexibility to create a button in the header that directs users to an external page. Whether you wish to integrate a link to a third-party service, such as a status page, or a specific page on your website, the choice is yours.
To create a Link menu, simply click on the "+" sign in the menu bar. In the ensuing pop-up wizard, input the desired menu name. This will appear on the button in the documentation header. Add a slug, then select "Link" from the dropdown menu under "select menu type." Once the link menu is created, specify the URL you want the menu to point to and indicate whether it should open in a new tab or in the same tab.
Homepage menu
For more information about the homepage menu, please check the Homepage Article.